

A while ago I wrote a post about converting CS:GO demo/replay files to AVI using the internal console command startmovie and Lagarith Lossless Codec: although that tutorial still a viable way to produce good-looking 30fps movies in a decent fashion, the technique below is most suited if you want to make top-notch movies/montages and upload them on Youtube now that the Youtube player supports native 60 fps playback.
That’s why I made this tutorial, which is basically an updated version of the former one. By following the required steps you’ll be able to create FullHD, ultra-smooth 60fps game videos just like the following one:

To better separate its core concepts the tutorial has been splitted into three sections:
- Part One will focus on system requirements, CS:GO configuration settings and raw recording techniques in order to obtain a frame-by-frame recording footage (tga + wav) of each video part using the CS:GO spectactor-mode.
- Part Two will focus on converting each raw footage obtained during Part One into a single high-quality AVI file, importing them into Sony Vegas – or any similar video editing software – to create our project/montage.
- Part Three will address some common issues, as well as introduce some process/system optimizations in order to speed-up some steps and save some valuable time.
Suggested Hardware
Luckily enough, since we’ll not use external video-capture software such as FRAPS, DxTory or BandiCam (if you’re wondering why, read here), we won’t need any high-end PC: a system capable of running Counter-Strike: Global Offensive with good-looking video quality settings will usually be enough. Don’t worry about the framerate, as they won’t be relevant in the technique we’ll use: as long as the game won’t crash, you’ll be ok. At the same time, a decent SSD Hard-Drive with at least 100-200 Gigabyte of free space is highly recommended, although not required, as the process will be mass-memory intensive in terms of either speed and space.
Required Software
Assuming the Hardware is at least OK, let’s talk about the software we will use:
- CounterStrike: Global Offensive installed and ready (that’s pretty obvious, uh?)
- VirtualDub, a freeware desktop software which we will use to convert the raw frames obtained using CS:GO spectator-mode in one or more AVI file.
- Lagarith Lossless Codec, a freeware video codec we’ll use togheter with VirtualDub in order to keep our AVI files “small” (less huge would be a better definition) without impacting their quality.
- Sony Vegas or any other similar video-editing software (such as Adobe Premiere) to assemble these AVI files and create our final output.
Download and/or purchase these valuable programs, then install everything before moving on as you’ll need them all in the following steps.
Step 1. Choose the DEMO file(s)
If you’re reading this, chances are you already gathered one or some .DEM files for your project: if you do, jump to the next step, otherwise you need to grab at least one. The easiest thing you can do in order to do that is to use the CS:GO in-game GUI and download one of your previous matches: launch CS:GO, then go to WATCH -> Your Matches like shown in the following screenshot:
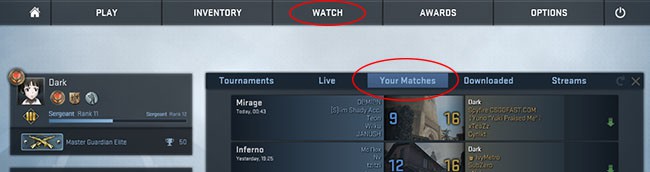
From there, click on one of your replays and select Download to grab that from the STEAM cloud to your drive.
Step 2. Adjust Video Settings
Before recording, you have to ensure that the playback will be performed using the best video quality your system can afford: launch CS:GO if you haven’t already and go to OPTIONS > Video Settings. From there, set the following:
- Maximum video/effects quality: shadow quality, texture detail, effects detail, et. al. should be all set to High.
- Adeguate resolution, such as 1920×1080, assuming you want a Full HD video.
- Windowed Mode: we need it to conveniently switch (ALT-TAB) between applications, and this is also advised when you need to extensively use the game engine’s recording feature.
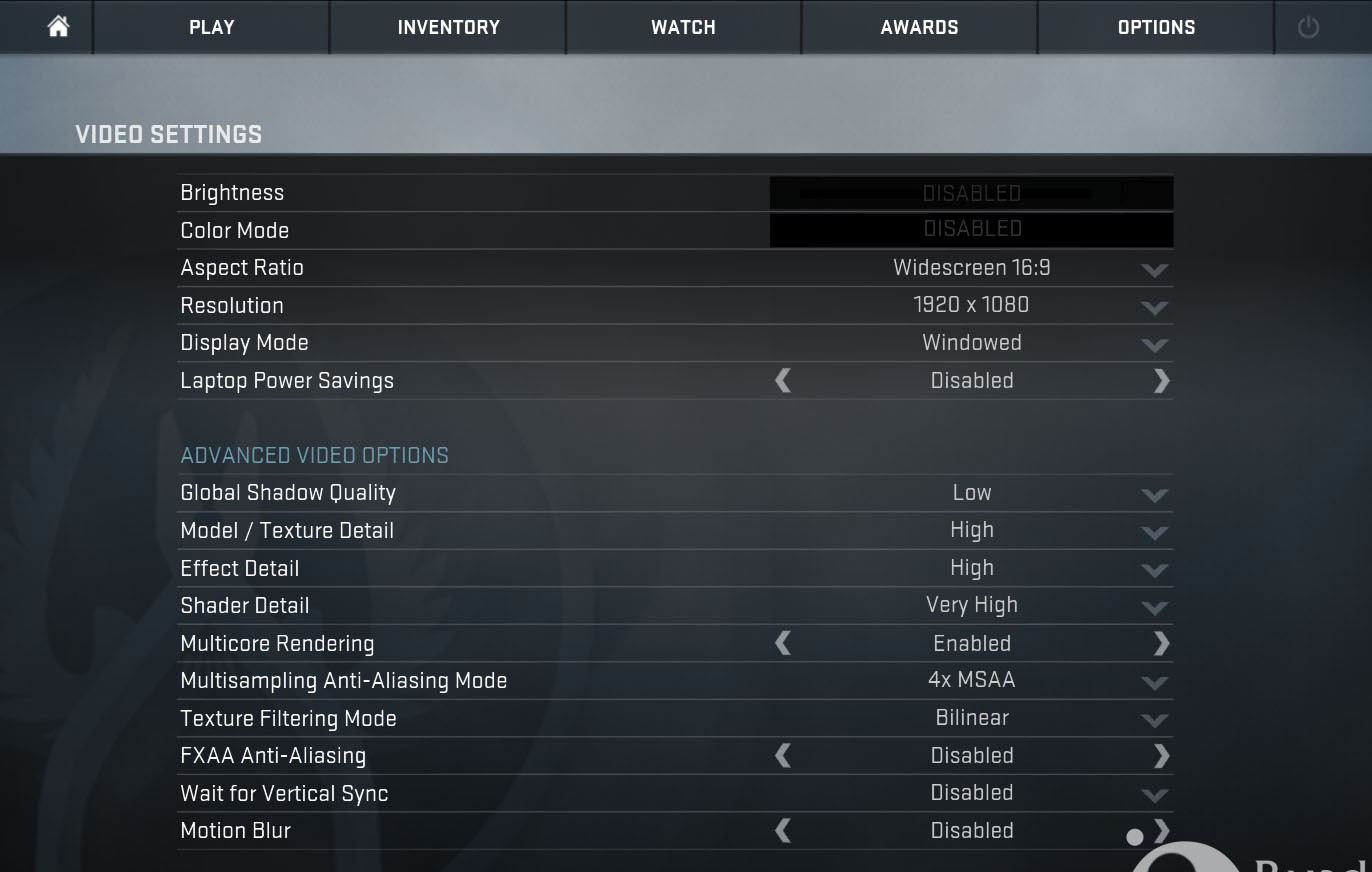
When you’re done, save everything by clicking to OK or Apply, then go back to the game’s main menu.
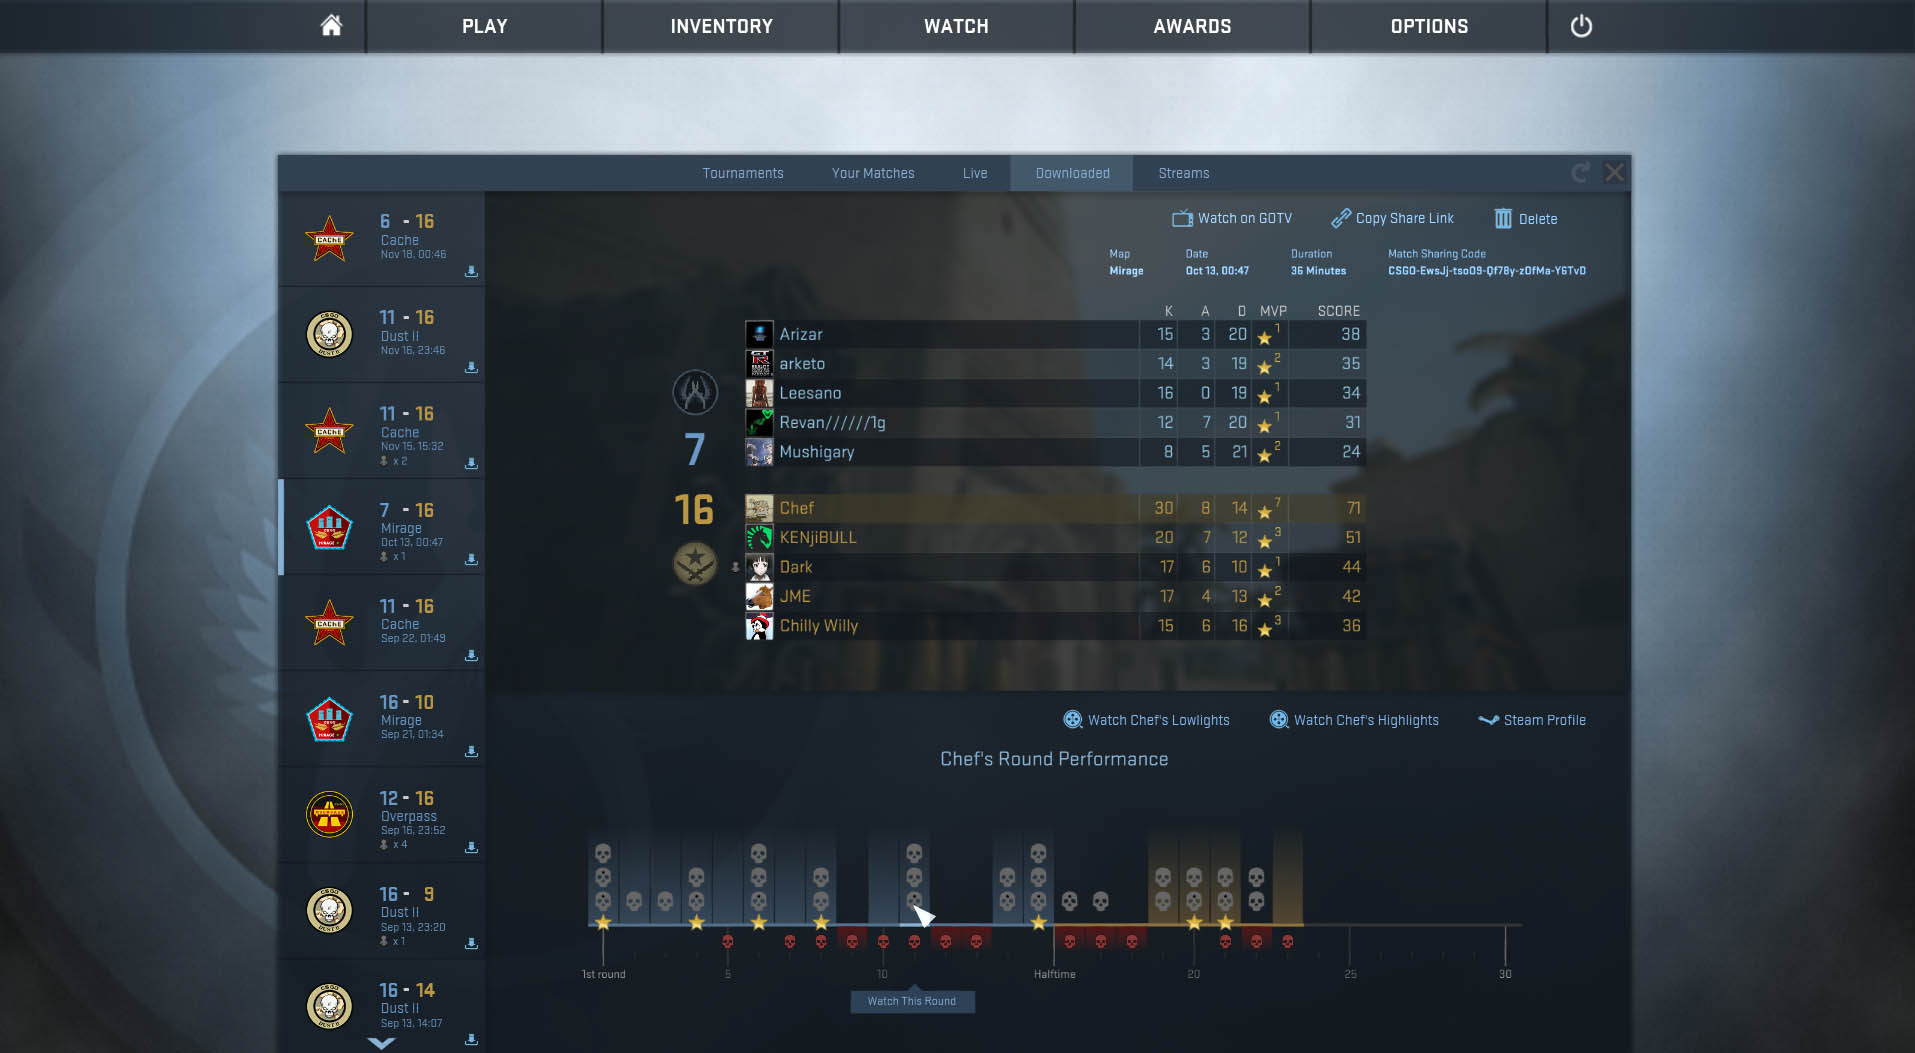
Step 3. Playing the Demo
Show time! If the replay you want to record has been obtained using the Download feature described above, you can playback it using the CS:GO GUI, which will also allow you to do issue the command for each specific round: a very handy feature introduced for the 2015 ESL One Tournament which will really help you as long as you’ll need to capture a wide amount of scenes taken from different games.
As soon as you select the game or the round you wish to record, the CS:GO spectactor mode will start to load it: get ready to press SHIFT+F2 to bring out the replay mode navigation console as soon as it starts: that way you’ll be able to pause the playback or move back and forth until you reach the exact point where you’d like to start your recording session. As soon as you’ll reach your desired starting point, you’ll need to execute some console commands.
Step 4. Console Commands
Once you reached the round or sequence you want to record, pause the replay by using the navigation console (SHIFT+F2, as mentioned above), then bring down the console by pressing the \ or ~ key (depending on your keyboard layout) and issue the following commands:
net_graph 0
cl_draw_only_deathnotices 1
host_framerate 180
startmovie "D:\csgo\01_" raw
Here’s a brief explanation of what we’re asking the game to do:
- net_graph 0: hides the net graph, which is the small HUD panel showing our network connection’s details: we usually don’t want it to be shown in our CS:GO movie – unless we’re doing it to brag about our newly purchased, top-notch video card. Needless to say, if net graph it’s already off as you’re not using it you can skip this command at all.
- cl_draw_only_deathnotices 1: hides map, life indicator, team-related info and basically all HUD indicators but the crossair. It’s the most used display mode for CS:GO videos, since it leaves the eye free to observe the action. If you want to add some of the standard info you can also opt for an intermediate visualization by issuing cl_draw_only_deathnotices 1 and, subsequently, cl_draw_only_deathnotices 0.5 to bring the lifebar and the topmost teams recap into view: the choice is up to you.
- host_framerate 180: sets the replay playback framerate to 180 frames per second. That number is a good balance between the recording size and the smoothness of the outcome result: a higher number will increase both and vice-versa. My suggestion here is to stick to 180 for your first attempt, then try to increase or decrease depending on your results: just be sure to pick a number which is a multiple of the resulting video target FPS, which will be 30 or 60 fps depending on your choice. That means that 120, 180, 240 or 300 will all be good. Now you could ask: why can’t we just use 30 or 60? The reason is simple: what you’re doing now is to create the source clips that will be used to create the resulting video: in order to make the final outcome as smooth as possible the best thing you can do is to aim for a much higher framerate, which will then be interpolated by Sony Vegas to create an extremely good-looking smooth effect. This is the key reason we’re actually using this technique instead of going for external capturing software, and basically what this guide is mostly about.
- startmovie “D:\csgo\01_” raw: this is the command we use to tell the spectator-mode to start recording what we’re seeing. The D:\csgo\01_ path is just an example, adjust it to your needs: just use an already existing, possibily empty folder. Be sure to include the raw attribute, which will instruct the recording software to save each and every frame in a single, uncompressed .tga image file: meaning that, if you set a framerate of 180, it will generate 180 .TGA files per seconds. Now you can undestand why we recommended about using a SSD Hard-Drive and having a lot of free space.
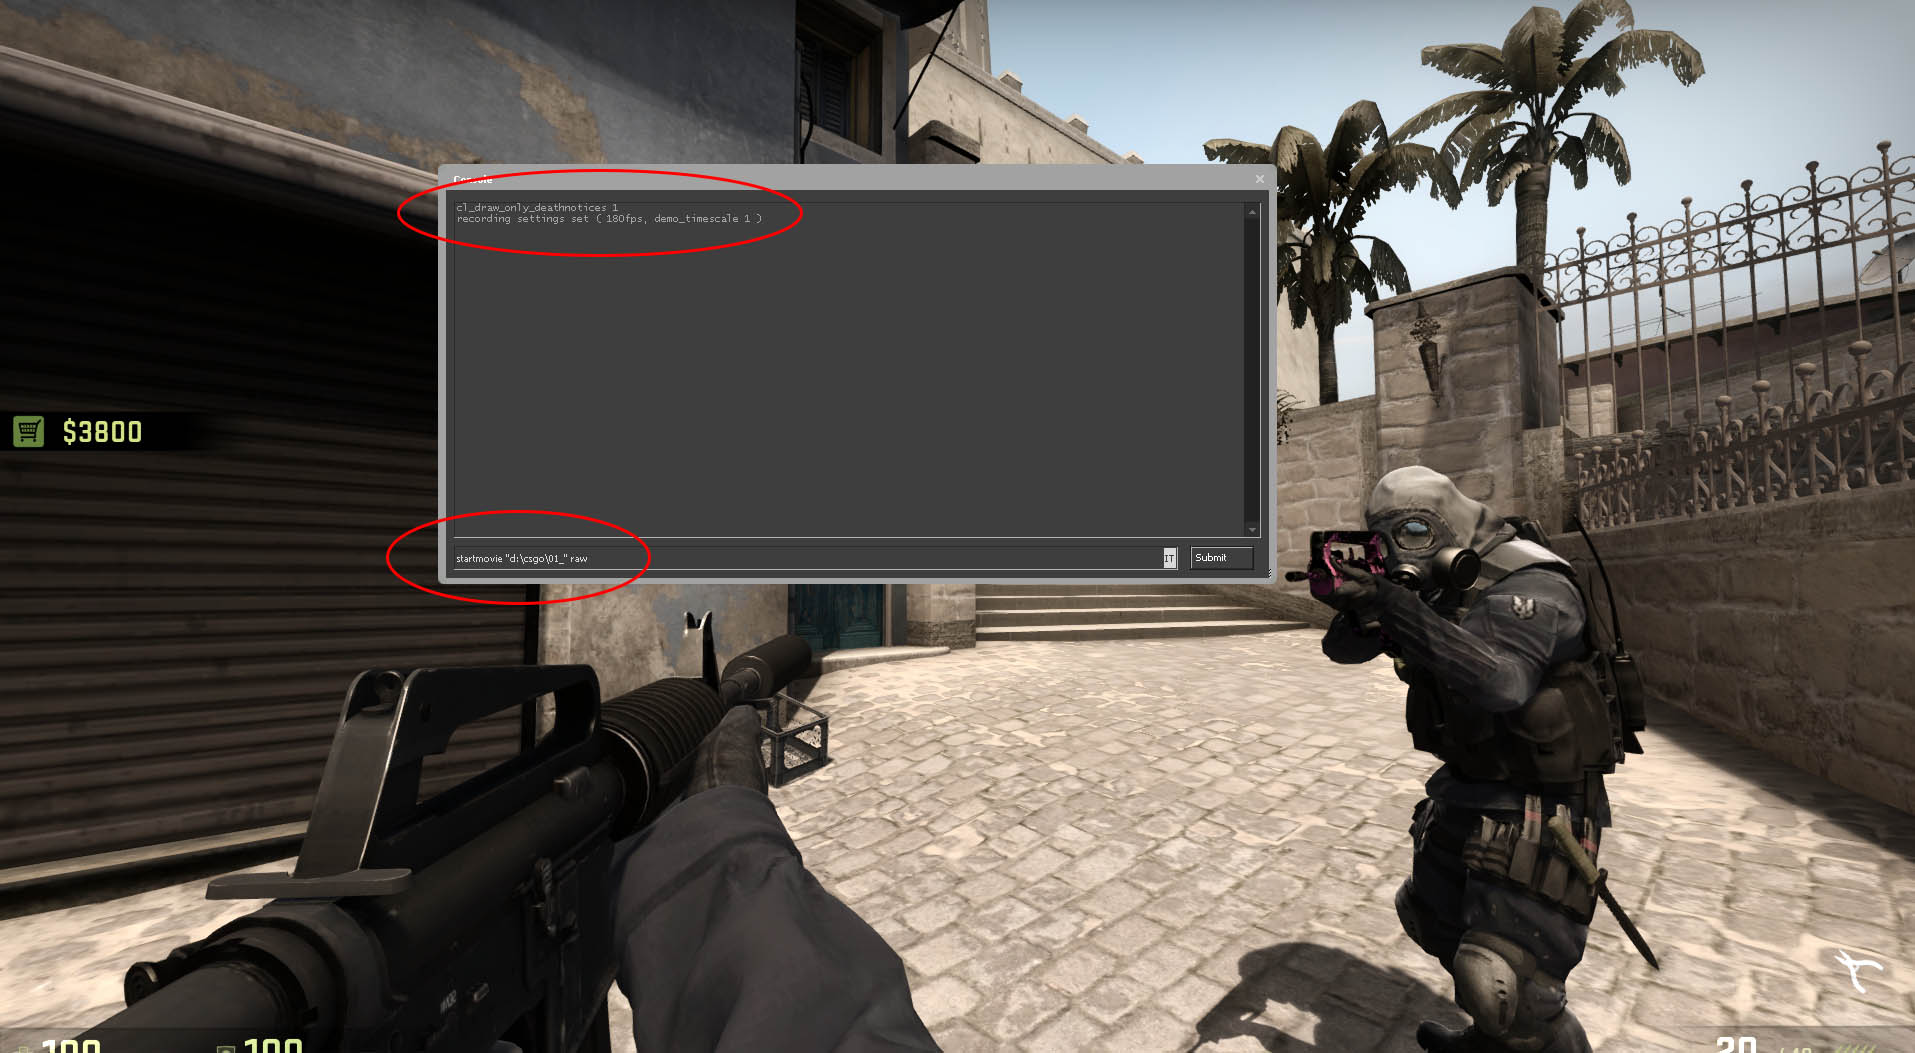
Notice that the recording won’t start right after issuing the startmovie command: you will be prompted by a message which will tell you that the recording will start upon closing the console.
Step 5. Completing the recording phase
In order to stop the recording session, open up the console an type endmovie. As soon as you do that, after waiting a couple seconds to allow CS:GO to flush the latest frames and finalize the session, it’s advisable to open the containing folder and check if everything is ok. Upon a successful operation you should find the following:
- a single .wav file, containing the recorded clip audio.
- a remarkably high number of prefix_nnnnn.tga , containing the frames of the recorded clip.
That’s all for now: in the Part Two of this tutorial we’ll see how to convert these raw recording files in a single, 180fps AVI, how to import it into Sony Vegas and how to configure the software to render a 60 fps high quality video file ready to be uploaded on Youtube or published/distribuited elsewhere. In the third part of this tutorial we’ll see how to fix some common issues (such as the VirtualDub’s 10000 frames problem) and properly configure/optimize our system to perform these steps while saving a good amount of time.
Continue to Part 3